Pages

Thursday, December 26, 2013

Christmas Gifts

Well now that Christmas is over, I can finally post pictures of what I made!


The first gift, which I am incredibly proud of, is a travel backgammon set. The pattern is in the new book "Sew Gifts!" I decided to make the set magnetic, which was not in the pattern. I sewed magnetic strips under each triangle on the board and glued little magnets under each game piece. Now as you might imagine the magnets are pretty weak, but I still say they are better than nothing for keeping your pieces in place on a bumpy plane or train ride.


It looks pretty simple, but actually took quite some time to put together. The first time around I stitched each triangle in the opposing color thread, as shown below. Unfortunately by making the thread so visible I really highlighted my wibble wobbles. Plus, I discovered that the instructions omitted seam allowance (note below how the triangles go right up to the edge of the board) so I just scrapped the whole piece and started over. Luckily felt is super cheap and I had bought a bunch, so it was no problem.

 All of the game pieces were made with fabric covered buttons. The biggest pain here was working with pliers to remove the actually button backing from each button so that they would lie flat! And of course I went to special store to get the yellow and blue dice, which I am very proud of. They really complete the whole thing. :)


 This project actually used very little fabric, so I had a bunch leftover. With the spare fabric I made this lovely potholder!


The potholder is from a free Moda Bakeshop pattern. I think it comes out lovely, and all those layers of folded fabric mean that your potholder is extra thick and safe. Of course, my mom immediately nailed this to the wall upon receiving it, so I doubt it will get much potholder use! I also made a few more of these in different colors, but apparently never photographed them. I tend to do that.

Next we have the quilter's wallet! I bought this pattern, AND all the supplies, back in 2011. In my quest this year to rid myself of UFOs, one day I just decided to sit down and do it. The pattern was not necessarily easily, but the instructions were incredibly detailed and easy to follow. I never had to worry about being confused.


The wallet has all kinds of goodies inside. A vinyl covered slot holds your ID, and there are many little slots for credit cards. There is also a penholder, a zipper pouch for change, and many narrow slits for stuffing your checks or cash. It's pretty nifty!


And here is the decor on the outside. Very pretty. BTW, this came together with only two fat quarters and one half yard of fabric.


 Now I did make other presents, but apparently took no photos. The other main ones were hot/cold packs. These are basically long tubes of fabric filled with rice. You can put them in the freezer or microwave. They are great for icing aching joints or warming your toes when you go to bed.

Also, of course, was the quilted jacket which I gave my mom. She wore it to work today and got tons of complements. It fits okay if not buttoned up and worn with a nice sleeveless top underneath. Of course whenever I look at it I see all the errors, but I know others won't notice them if I don't point them out so I have been trying to keep my mouth shut!

Okay, here are the sewing presents that I received!


I am very excited about the Quiltak system after hearing others wax poetic about it. It is supposed to be far faster than pin basting. AND you don't have to remove a pin every time you come to it while quilting; the little taks can just be stitched right over! Pretty awesome! We also have a new rotary cutter (ooh ahh) and a pinking blade, which I specially requested. The small ruler and measuring tape are souvenirs of our trip to the Sisters Outdoor Quilt Show this year. And that last thing, which got a bit washed out, is a ruler for marking where to stitch your quarter inch seams on weird junctions and angles. For example, at the dreaded y seam, which I am pretty awful at stitching.

And of course I have been keeping up with Bonnie's Celtic Solstice mystery and am ready for the next clue.  Here are my finished squares from clue #4.

Also, I have been experiencing an issue, one which I experience a lot actually. I think it's a tension issue. I sew together two straight pieces of fabric with a straight line and the end product comes out curved. See the top edge of the piece in the photo below. I can't get this strip to lie flat, the curve you see is the natural way it wants to sit. Anyone know why this happens?


Monday, December 16, 2013

Celtic Solstice Part 3

Well for the first time in the Celtic Solstice Mystery, I am done with a clue in time for the Monday link-up! Click on the image to view others' quilts in progress. I am really enjoying seeing all of the different color schemes, and I can't wait to see how all the finished quilts will compare to each other!


Doing half square triangles this week was a nice change from last week's chevrons, which were certainly more involved. I was really impressed with the Easy Angle ruler as well. Half square triangles always confound me (I ALWAYS have to print templates because I don't want to deal with the math!) but this takes all of the confusion out of it. I found these guys to go very quickly and easily.


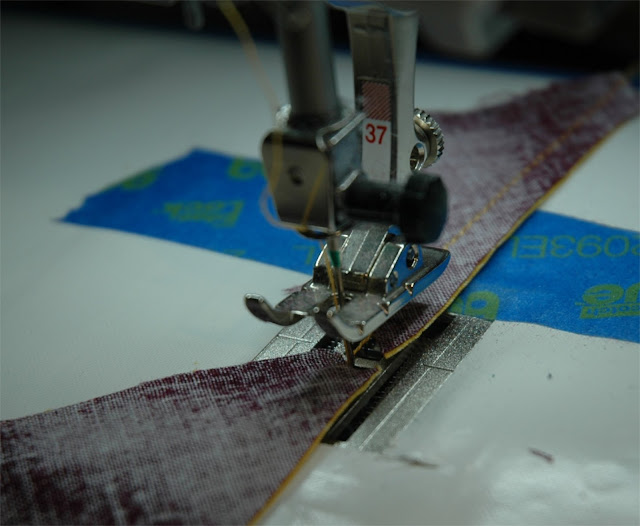
With these small pieces, I have been having some trouble with ends getting sucked into the throat plate. I don't really know if there is a way to prevent this...


Here are the finished pinwheels. I pressed the seams open to reduce the bulk. In general they came out much cleaner than my chevrons and didn't require tons of squaring up.


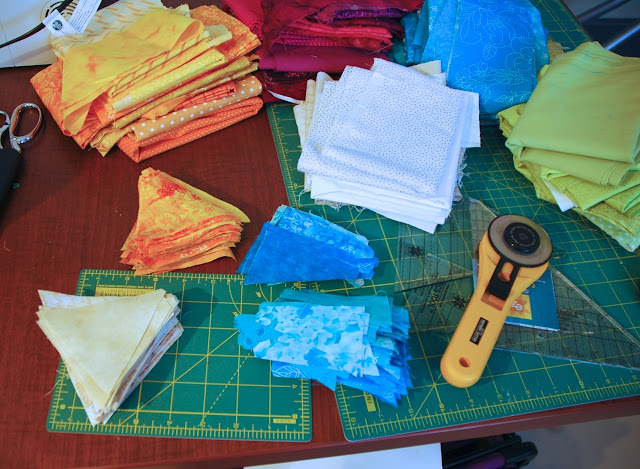
In other news, I continued to work yesterday on my Catvent kitty heads.  I tried to get a long shot so you can see the color gradient.


Do you see the gap?  I sure do! There needs to be an intermediary step between the orangey-red and light orange. Unfortunately I only have a single fabric in that color range! Oh well. I have really enjoyed pulling out all of my boxes of fabric and going through it to find the perfect color combinations.
I am heading home for the holidays tonight but am bringing my Celtic Solstice supplies so I don't fall behind! :)


Sunday, December 15, 2013

PSA and Catvent Quilt Along

Guys, a little PSA here: Next time you are looking for quilt inspiration, visit your local library. I recently dropped by to get a new card and came home with these books:


All are recent releases, and books I have considered purchasing at one point or another. And these weren't even their whole quilting selection, these were just the small subset that interested me. AND this wasn't even the central branch, which I am sure has even more quilting books.  I also snagged some books on slipcovers, which is great as a resource because making one is on my 2014 "to do" list. Okay, PSA over.

I have also begun to participate in the "Catvent" Quilt Along occurring at Oh Fransson. It's a crib/wallhanging sized quilt of modern kitty heads, each pieced in a different manner. Unfortunately Elizabeth announced pretty much the same day as the first Celtic Solstice clue came out, so I am behind on participating. That's okay though, because each of these kitty heads goes together about 5 minutes, so I should be able to catch up relatively quickly. I am making the quilt completely from my stash and am having a lot of fun following Elizabeth's rainbow theme and trying to pick the perfect colors for each kitty head. 


It's interesting what photos can show. I thought I was doing great on my gradient, but now I suspect that an intermediary step is needed between the eggplant and royal purple heads.  Color is a passion of mine so I am really enjoying the challenge of making the colors flow through the rainbow perfectly!

When done, this quilt will be going towards a Feb fundraiser for Tenth Life Cat Rescue, an organization I have recently become involved with here in St. Louis. They focus on strays with special needs (e.g. blind, missing limbs, and so on.) I feel I have already made a lot of friends through them, as they are a bunch of incredibly compassionate people.

Thursday, December 12, 2013

Celtic Solstice Part 2

Well I'm a little late on this since the Celtic Solstice link-ups are on Mondays, but I prefer to take my time with each clue.  This way when I finish up on Thursday I'm not left twiddling my thumbs until the next clue comes out on Friday!


A word on my fabrics (actually a mini rant!). I bought most of the fabrics for this quilt from Joann's. Since I don't know whether I will like it and what I will do with it, I didn't want to spend a ton of money on fabrics. Every time though, I get a little frustrated. In this case, I bought a lot of skinny quarter yard cuts for that "scrappy" look Bonnie's quilts go for. In trying to square these guys up, I found that each was off by on average an inch. The worst was off by about 3 inches..ouch! At one point I just stopped squaring up the fabric because I was losing so much in the process.  I think part of the problem is the time pressure they place on the people at the cutting table. Also making them cut with scissors instead of a rotary cutter. But it is definitely frustrating to come home and lose so much of your fabric due to poor cutting.

And these are four fat quarters, all from Joann's. These guys come to the store prepackaged from factories, so you would think they would be cut correctly.  Can you see how far off from each other they all are?  Pretty nuts.

Back to the mystery.  Here is a shot of my finished blocks from part 1. My camera was giving me such a hard time that I started taking ipad photos. The quality isn't great but at least they aren't blurry and I can get pretty accurate colors. After mistakenly cutting yellows instead of pinks (pinks was supposed to be my stand-in for Bonnie's orange) for Part 1, pinks are now replacing Bonnie's yellow.


I found Part 2 slow but easily breakable into chunks. First I cut all my pieces, then spent a while marking diagonal lines on 200 little squares with my frixion pen. After reading a bit about ergonomics, I moved my cutting area to my breakfast bar. It was great! I was able to cut while standing or seated without bending over.

Cutting set up at the breakfast bar!

Whites


greens
pinks
I do wish there was a way to make these chevrons while wasting less fabric. I saved all of my mini triangles left over but it did end up being a LOT of scraps!

Baggie of scrap triangles. Hopefully I can find a use for them!

Now, as for the stitching...I am really bad at sewing straight lines. Especially when Bonnie tells me to not sew ON the line, but NEXT TO the line. Sometimes I was on the line, sometimes I was right next to it, sometimes I was way off.

Waiting to be trimmed.

As a result, my final chevrons were often wonky.  I ended up spending a good amount of time squaring them all up in an attempt to correct some of the innacuracies.
Leftovers from squaring up my chevrons

Many met up correctly like this


But some just didn't line up, like this one!

I took some cues from others in the mystery and have been paper clipping each group of ten to keep track of numbers. I also learned that by keeping my chain pieces attached to each other, I can "chain iron" them.  It was definitely faster than when I was trimming them apart and then manually lining each up for the iron...looking back I don't know why I did it in such a slow manner!

Well I still have about 10 chevrons to make...I accidentally made 60/40 going in each direction instead of 50/50 so I have to go back and remake some of the chevron sides.  Talk to you next week after Part 3!

Tuesday, December 3, 2013

I Miss My Camera!

The hardest part of blogging for me is the photos. I forget to take them during the process, and then when I'm done it's usually the evening and the light is terrible. And for the past few months, my beloved little point and shoot has been missing.  I just did another sweep of my house and still can't find it.  Where are you, little camera? If you are reading this, please come home! I miss you!!

In the meantime, I've been using my boyfriend's fancypants SLR. I thought it would lead to better photos, but it turns out even a good camera can take bad photos in the hands of a novice. So, without further ado, here are some bad photos of my two latest applique blocks:


Peas:


and Carrots!


The color on the peas block is not quite right. I should not have mixed my two green color families.  I always tear my hair out over which colors to put where and end up just throwing things together in the end and they don't always come out great.  It's so hard to tell until the thing is put together, and then it's obvious to me which colors I should have done where. Sigh.


However, I am very, very proud of my carrot block. This was the first block I attempted on the quilt, and I quickly discovered that turning all those tiny curves using the press and starch method was extremely difficult, and led to questionable results. So I put it aside for a while until I felt my skills were up to it.
The one and only leaf I tried to prepare with the starch method.
For the past few weeks, I have been taking a hand applique class at my LQS, focusing on the needle turn method. I will be honest: I am not a fan of this method. I find it makes the stitching incredibly tedious and difficult. I much prefer to get the tedium out of the way in advance through starching and ironing all of the sides under, so that when I sit down to stitch I can just enjoy the process of sewing.


In this case, a little bit of needleturn was exactly what was needed. Manually turning under the edges allowed for more precision and far less fraying than the starch method did. The problem with the starch method is that everything is turned under at once, from the start. With needleturn you only do a teeny bit at a time, which allows for those curves.  There are still frayed bits, especially at the inner curves, but in general I am very happy with these leaves.

The one downside is if you look at the frontmost carrot, there is no stem coming directly out of it! I should have lined things up a bit better. However, I doubt many will notice so we'll just keep that error between you and me. ;)

Monday, December 2, 2013

Mystery Quilt Part 1...whoops!

I was very, very excited for Bonnie Hunter's Celtic Solstice mystery quilt to begin. So excited, in fact, that I cut 90 triangles from the wrong color fabric. Yep.


I am using slightly different colors than Bonnie, and I didn't think before doing my cutting. Here is the color mapping:

Bonnie          Heather
Yellow  -->  Yellow/Orange
Orange -->  Pink
Green  --> Green
Blue  --> Blue

You can see the colors are pretty darn similar. The tricky bit is that I have one color of yellow/orange, whereas Bonnie has yellow and orange as two separate colors.  So when I saw 90 triangles of "orange," I just went ahead and cut out of my yellow orange. And didn't realize until I was done cutting that I should have done pink.

So.

People who have done mystery quilts before: Should I just go ahead and flip my pinks and yellows in the quilt? (e.g. when Bonnie says orange, I will do yellow/orange, and when Bonnie says yellow, I will do pink)  Should I recut triangles in pink and hope I will find a use for the yellow triangles I already cut? My main concern here is wasting all the fabric I already cut.  

I am secretly hoping that next week Bonnie will tell us to cut 90 triangles of yellow, and then I will be able to make use of these triangles without messing with the color scheme. Fingers crossed!

You can read up on everyone else's mystery quilt progress at Quiltville.


Sunday, November 24, 2013

Cabbage Block

Here is my completed cabbage/lettuce! This is replacing the Cauliflower block.


This design was a free pattern over at Ravelly. If you don't follow Rhonda, I highly recommend doing so. She provides a lot of free applique patterns and does beautiful and creative work.

This cabbage was quick and easy! Only 17 pieces, and all were BIG and had gentle, sloping curves. It was a breath of fresh air!


Here are all the blocks completed so far. On a side note, this is a really awful photo. A fancy camera does not automatically give you fancy photos if you don't know how to use it! (I don't).

So we have four down, five to go.  The remaining blocks are broccoli, squash, peas, carrots, and the center block, which will be a special design. Okay, enough procrastinating on starting the actual stitching...

Tuesday, November 19, 2013

Celtic Solstice Mystery

I am so excited that for the first time ever, I will be participating in a Bonnie Hunter mystery quilt-along!  Bonnie's quilts always come out GORGEOUS and I have wanted to participate for some time. However, usually I have just too many other projects going on. Not so right now!  I have cleaning out my UFO pile and am feeling confident and ready to tackle this new project.


Now normally I would trust Bonnie on color selection, but I was not a fan of her choices this time. I lately have become obsessed with a certain shade of bright blue, so I plugged that into Adobe Illustrator and came up with the following palette.


Now my stash isn't very large, so I will admit that I went on a bit of a shopping spree to procure these fabrics. It was very fun to get quarter yards of many different fabrics in similar shades.  Surprisingly, I already had enough lime green, which to me is odd because it isn't a color that I have a particular affinity for.  Somehow it shows up in all of my projects I guess!


The mystery starts next week - I can't wait! You can learn more about it here if you are interested in participating.

Friday, November 15, 2013

The Saga of the Pieced Jacket

Okay, camera has been repaired so now I can share with you the full (and finally complete) story of my pieced jacket.

It all started back at PIQF 2011. I saw a jacket pattern, thought it looked nice, and said "hey, I'll make a jacket for my mom!"

The original pattern.  Looks cool, right? (Also nothing like my final jacket!)

Together my mom and I chose this loooooovely color palate. As a side note, because the original jacket was really baggy, I ended up with probably enough fabric for an entire quilt.


Unfortunately when I made the muslin foundation, we determined that the jacket was not stylish enough for her.
Looks like a lab coat!
 So we went out and bought a stylish coat pattern!

Here was my first attempt at a muslin foundation.  You can see all the proportions are off, but at least it looks more fitted than the original jacket design.


For some reason I thought it would be a great idea to use the piecing design from the original pattern (which as you can see has nice straight lines and not fitted curves) and try to morph it onto this other jacket. 

The original design calls for lines of equilateral triangles with strips of fabric between them. So I attempted to do that on the curvy pieces of my jacket. 


If I recall, I marked the seam line, then marked about 2" in from that (for those fabric strips, then sewed the triangles to the muslin so that their points all met the seam line. It was basically foundation piecing. You can see that I started with uniform size and shaped triangles, but in the end they were all different sizes and shapes, based on the contours of the jacket.

First panels pieced! Notice how much longer the jacket is here than in the final version.

Here you can see me drawing out the design onto the muslin, which ended up being a foundation.
For a while I was foundation piecing without realizing that I was doing it, which led to a lot of squinting to see if lines matched up and general headaches. Once I realized it was basic foundation piecing, things went much more smoothly.

Another panel complete!
Then I ran into another big headache: Trying to stitch on those fabric strips. It involved curved piecing, which I had never done before and didn't know how to do.

First I tried to just cut a 2" and stitch it down, which led to all kinds of rippling.

I finally jut stitched on a giant piece and trimmed it down later. It was hands down the hardest part of this process and took FOREVER.


Front panels complete!

Then came the back panel. By now I was feeling a lot more flexible about following the original pattern (and having realized that it was REALLY TOUGH to follow) so I went with the foundation piecing approach and traced out my design in advance.

Except, of course, you can see this would require Y seam if directly foundation pieced. So I had to make diagonal strips and line them up.  Again, this complicated things probably more than they needed to be and involved a lot of tedious eyeballing.

All stitched down!

I don't even know what I was thinking in the photos below. Some weird and time-consuming made-up method for curved piecing. Oy.


back strips attached!

So, well over a year ago, I finished everything in the body except the sleeves, and by this point was so mad at curved piecing that I stopped and put the whole thing away.

Last week I picked it up again with a fresh eye. Taking into account my past grievances, I decided for the sleeve to just do diamonds of a uniform size and shape: 3.5".


Then came so pretty pathetic attempts to figure out how to add seam allowance. I mean, really. I am sure this is super basic geometry but heck if I remembered it.

So without seam allowances, the finished diamond was 3.5" on each side. So naturally I cut a diamond that was 4" on each side. As you can see in the photo below, it was too small.


Then I tried to look up sizing online but couldn't find anything explicitly spelling out how to figure out your cut size based on your finished size.

So finally, in desperation, I traced out my 3.5" diamond and manually traced the seam allowance on, then measured to see what size that was.


And if you were wondering, the answer is weirdly simple. Cut a strip of fabric whose height is your finished diamond side size (so my strip was 3.5" tall) and then lining your ruler up along the 30˚ angle, and cutting a diagonal piece that is also your finished size (3.5" for me). I don't think I explained that so great, but this is about the point where my camera broke, so I don't have any more photos of assembly. 

Here's a final shot I took of my color layout plan before I assembled the diamonds.


Okay, so fast forwarding to the finished jacket. The sleeves sent together very nicely and the jacket actually assembled very easily. I will say this about Simplicity: They do a GREAT job of making very easy to follow instructions. I had no clue what I was doing, but they were extremely clear in their instructions and spelled out every last detail. 

So here are some beauty shots of the final jacket:


Side shot. I think the diamonds on the sleeves came out well. The diamonds did not meet up evenly on the underside, but I doubt many will see the underside of the sleeves.

The back. Slimming!

Okay, so what are the lessons learned? First, I should have made my muslin foundation too long.  I shortened both the sleeves and hemline up to what I wanted the final length to be, but of course some fabric had to be turned in and I didn't account for that, hence sleeves and length that were a bit too short. Notice the difference in hem length in the original muslin foundation and finished piece in the photos below.


I also shouldn't have used cotton for the lining. Some people I chatted with suggested silk or voile. I guess the cotton was too bulky. Once I added the lining suddenly everything was too darn snug. Grr. Notice in the photo below that the jacket bulges in between buttons and is crinkling near the midsection. You can also see in those photos above how it was much more fitted and slimming in the muslin version. I blame the lining.


Also I have since learned that you should pre-wash muslin because it is very prone to shrinking. Since I didn't prewash my muslin, and ended up sewing it into the jacket, this thing can probably never be washed for fear of it becoming all wrinkly and ruined. Ack!

The good news is, this thing looks better and is pretty comfortable if you wear it unbuttoned!


And now it's all done! Phew!  If I ever do a jacket again, I'm going to use the fabrics recommended in the pattern and not try to do my own thing. I will definitely use Simplicity again for clothing patterns as they are very straightforward and I think I need things spelled out for me for a few more projects.