Pages

Monday, September 22, 2014

Veggie Quilt is Quilted!

Every time I sit down to quilt a quilt, I decide that I hate machine quilting. I'm not quite sure why, but part of it is that I find it super intimidating to choose a pattern. So many quiltmakers are able to create complete secondary designs with their quilting. It's something I would like to do but my brain isn't there yet in terms of being able to visualize what I should do.  But after three weeks and a lot of angst I have a quilted quilt!
If you are thinking that you can't see the quilting at all....yep. More on that in a bit.

So when it came time to quilt I spent about half day just looking up ideas online. I was trying to find fillers for behind the applique that wouldn't be too dense but would also fit into all kinds of weird shapes and sizes. I took my old paper applique templates and doodled patterns all over them. I went to the library and got quilting books. I scoured pinterest.


 Even though I knew it would be really hard to stitch on a machine, I auditioned this crosshatch...it just looked bland and sterile. I really thought it would be cooler! Maybe it has a bit more flare when stitched.


After about four hours of this my brain was fried and I was just like "I'll make them all different!" This way I didn't have to decide on a design. So all nine applique blocks have a different filler behind them. It was a good compromise because some blocks have a lot of wide open space and others have many itty bitty nooks and crannies, so I could pick the right pattern for each one. It does make the top a little less unified though.

Miss Pepper was there to lend emotional support. 

And by this point it was late in the day and the quilt shops were closed. I have been very disappointed with the thread options at my nearest shops (one only sells 60 wt or 30 wt...what??) and didn't feel like driving 20 minutes...so in sum, I just went with whatever threads I already had. Which meant monofilament for the top because I didn't actually have any colors that matched the top.

Now the mono is certainly easy, but the disadvantage is that I did kinda work hard on this quilt and all of the quilting is pretty much invisible. The only consolation is I chose a big fat 30 wt for the back so the quilting stitches actually look quite lovely on the backing!

So I started stitch away and the needle was just bouncing and making a weird noise, although the stitches looked ok. I thought maybe I needed a new needle and finally stopped the machine. To my horror I discovered the throatplate had come loose! And when I pulled it off, I discovered all this underneath!


Eek!


That's all the lint I managed to extract. Now I DO keep my machine in good repair, but you can tell look at it that this lint is all from the fleece. And I had only just started the quilting! (Come to think of it, now that the quilting's done I should probably give the machine another cleaning!)

Generally I didn't do any marking, but for these triangles I didn't trust myself. I tend to quilt far more densely than I should. This time, I found a design online, resized it to the right shape, printed it, stitched through it with no thread, and then used the perforated paper as a stencil. I got to use my quilter's pounce for the first time! It is basically a chalk filled eraser-looking thing that you rub over stencils and it leaves nice chalk lines. And it did a great job here! Below you can see the lines and then the final stitched leaves.


So without further ado, here are some random close-ups of the quilting. It was rather hard to photograph due to the invisible thread...

I managed to do pretty well at keeping the wrinkles away everywhere except the border. It was interesting how the ease of stitching changed with the fabric (there are 6 different fabrics in this thin strip border). This dark green was especially wrinkly, while the batiks were super smooth. 

This cat literally runs over whenever she sees me taking photos! This was supposed to be an elongated spiral but it came out looking kind of identical to the woodgrain I did on another block.


Here's the back of the corner square. I liked how this came out with the curves to counteract all of the angles.


Here's the backside of the cabbage block, with spirals!

And the back of one of those triangle units I showed before.

Well that's it for now, I have just bought the binding and hope to have this quilt finally finished very soon!


Monday, September 1, 2014

Getting back into quilting with a big finish!

Moving homes took a lot more time than I anticipated, and it's only in the past few weeks that I have unpacked my sewing supplies and slowly eased back into quilting.  Here is the new sewing room:


Already cluttered, I know. I probably should have taken a photo before I started work! Do you see kitty lounging under the sewing table?

I am becoming a big fan of this space for many reasons. First off, it doubles as my boyfriend's study room.

At first I wasn't too thrilled about sharing my space, but now I really like it. I was originally worried about having my sewing area separate from the general hang-out area since I don't like to feel antisocial when I sew. This way, I can sew, he can study, and we can spend time together!

It's also really nice that there is no tv in this room. We're one of those houses where the tv seems always on in the background whether anyone is watching it or not. Having a nice, quiet, tv-free space for working keeps my distraction level down. 

So, as I mentioned, I've been easing back into sewing, first and foremost with my veggie quilt, which had the border already pieced and ready to go before we moved. After a week of plugging away at piecing the final inner and outer borders...we're all done!

BTW Mr. Photographer still has a lot to learn about quilt photography...sorry for all the weird slants and angles in these photos!! The finished quilt is around 60x60, a nice large lap size. One thing that gave me a big headache this past week was figuring out those diagonal lines that travel through the inner and outer borders. I'm not sure it comes through, but those diagonal stripes are supposed to correspond to the colors of the diamonds in the middle border.  Unfortunately the diamond color changes don't correspond with the row lines in the main quilt, and I think it looks  bit disjointed that the inner border doesn't meet the main quilt at seam lines. Oh well. 

I learned from this quilt that working without a pattern, at least when it comes to piecing, is not for me. I can figure out the math but it just takes me a long time and causes a lot of anxiety that I'm doing it wrong. So for the forseeable future...patterns only! It will be such a relief to have some instructions after trying to do everything on my own for this quilt.

And I realized I've never shown close-ups of all the blocks, so here they are! These are all hand appliquéd with embroidery. We took the photos in the sun so they all came out a little washed out.

Bell pepper:


Broccoli:


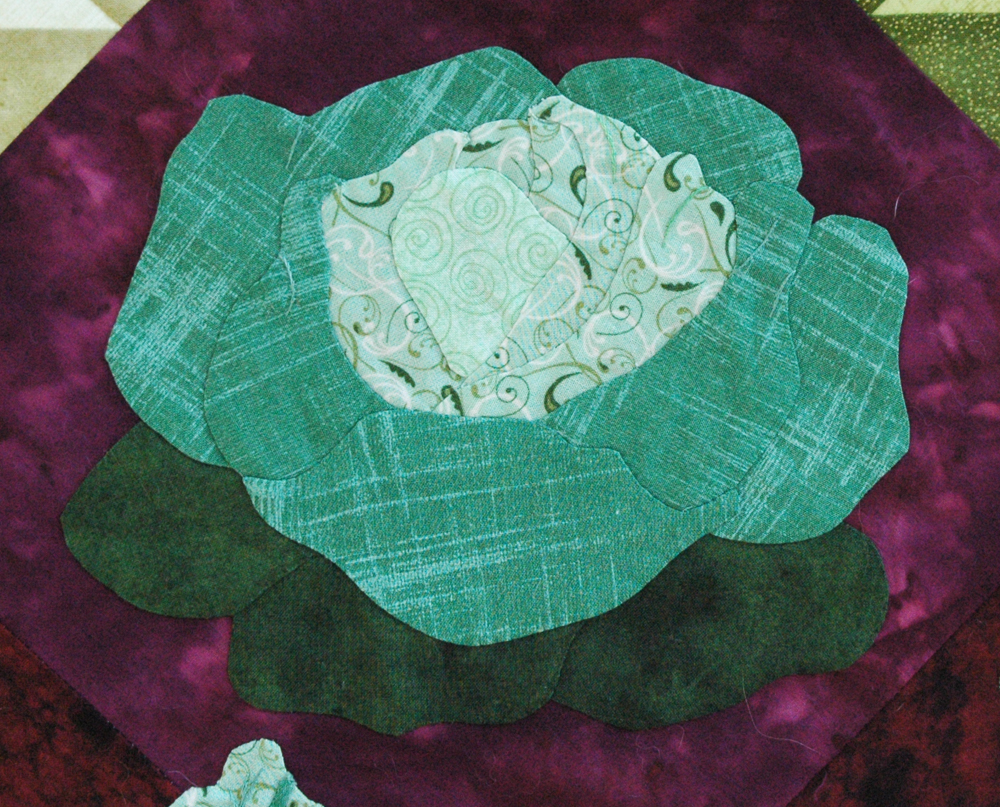
Cabbage/lettuce:


Carrots:


Red onion:
 

Peas:


Squash/zucchini:

Tomato:


 And finally, the Larry's Garden sign! This is a real sign in front of my dad's garden.


And that's all for now! I'm off to attempt to baste this thing and start quilting!

Thursday, July 17, 2014

Challenge quilt complete

Well I finally wrapped up my Michael Miller challenge quilt in the nick of time and...it came in second at my guild meeting!!!


Here is our pretty glamour shot. So many people came up to me and said they loved the kitty. This is great because I have really been wanting to do more realistic animals/plants/portraits in quilts. I have bought numerous books on this topic and it's great to know I'm headed in the right direction. I can't wait to make more.


Overall this quilt was a real challenge for me. On the quilting, I decided to not rip out all my work but instead just rip out a few of of worst bulges and smooth them over. While it's still not very good, it's at least passable when you look at it from afar (someone at the meeting asked me if I had used a longarm! Hah!) 

Of course the troubles didn't end with the quilting. I went to iron out my frixion pen markings, set the iron on a really low setting, but it wasn't hot enough. So I cranked up the heat and out of nowhere the iron got gunk all over and stained my top!


I thought I had melted the mono thread but after talking to many other quilters I do not believe that was the case. I am honestly unsure what caused this. Perhaps some rogue fusible web or spray baste?


There's a shot of the stain. As you can see, it somewhat blended in with the grey of the background! It turns out a tide pen worked to get rid of it. (How DO those things work???) More disappointing, I forgot I was using a scrap of polyester batting and the heat from my iron permanently flattened the center area. I love the loft of polyester but it's too hard to try to remember not to iron it!
But in the end it all turned out alright...or at least well enough. I learned a lot of lessons from this challenge I am glad I participated.

In other news, my sewing area, which used to look like this...

...now looks like this!


We have become proud first-time homeowners and are currently in the moving process.


Wish us luck! I get an entire bedroom to myself for sewing! It's the second story window you see in the upper corner of this pic :)


Wednesday, July 2, 2014

Time for some Truth Tea

Okay guys, its Molli Sparkles TM Truth Tea time!


Molli Sparkles

I started quilting my Michael Miller challenge quilt, and I think my quilting is pretty darn bad. I am really frustrated with how it looks. It's not done, but I stopped because it was looking so bad. The goal was to fill all of it with the echoing lines. 

Do I rip it out, or soldier on?


I was trying to be all "modern" by doing lines. But lines are not my thing. Look at all that puckering. And the world's worst spiral. Sigh.

OH to make it worse I left white thread in the bobbin. On a black background.


Eek.

So on the "don't bother ripping it out" side, we have the fact that this is just a challenge project, made almost entirely with free fabric, that I wasn't intending to keep anyways. I was going to try to post it on etsy but with this quilting I would donate it to the cat rescue for a fundraiser instead. 
We also have the fact that ripping it out would take forever. 

On the "definitely rip it out" side, we have that it looks pretty darn awful and I am frustrated because I really liked my top and now it looks like crap.

On the one positive note that I have to share, I like how my thread painted kitty turned out. This guy would be unaffected by said potential seam ripping.


PLEASE weigh in. I would appreciate any and all advice.


Sunday, June 15, 2014

Back to the veggie drawing board!

I heard through the grapevine that certain people thought I was done with my veggie quilt because I haven't posted about it in, oh, six months. If only that were the case!

Here is where we left of. The center was all pieced and ready for embroidery to add some finishing touches to each applique. The embroidery stage went swimmingly, but then it came time to design the border. And here is where I got incredibly intimidated. I wanted a border with flowers and plants growing up and around, bringing the quilt to life.

Something like this, but with vegetables:

This amazing quilt is called Meadows of Black Forest by Ellen Heck. And no, there is no patten, I checked.

But I really can't design that kind of border myself yet, I am NOT there. I originally was going to do some beans for the border from a pattern book I have:

But I sat down and looked at that and decided that I really, really, didn't want to do that much hand applique. 

So then it came down to a pieced border. My quilt is only 42" right now and I figure it needs to be up to 60" to be a useful lap quilt. So I needed to come up with a border that was 10" on either side, that didn't feel like it was dwarfing the center of the quilt, and that didn't feel boring either.

I also wanted something that showcased my color palate and the gradations of each fabric that I have at my disposal.


I will spare you the hours of my clicking around a million websites for border patterns. I messed around with a number of options and ideas in indesign, and here are the final two options:

While I love the idea of incorporating New York Beauty blocks, they detract from the design too much. This second one showcases all my quilt colors and still allows the center to shine. I like how it also carries out the diamond motif that is in the center of the quilt. 

Then came the math time...luckily the math was less of a headache than I thought it would be. The inner border will be 2.5", the diamond border 4", and the outer border 2.5".  Here are my calcs: 

Totally random jotting of numbers, but it works!

Now the diamonds were a bit tough because they need to be 4" across, which means each side will be shorter. Plus there's seam allowance to consider...if you're like me and this gives you headaches, here is my very simple solution:


I printed out a full-size version of my blocks, drew in a 1/4" seam allowance, and measured the result. Works like a charm, and no crazy calculations involved!

So began cutting time...
...with help from my assistant....

After I had cut an introductory amount, I laid out the quilt to make sure things were looking right. Then I realized there were two ways to lay out the border:


In the top one, the diamonds go against the background but with the main quilt. In the bottom one, the diamonds go with the background and opposite to the quilt. Luckily I can stitch most it together before I decide which way it should go.

As a side note, we have some kitten guests in our house right now! Here is one, Pink Eye!


So far they haven't been allowed near any sewing supplies :)